
If you create designs regularly, learning how to group in Canva can save you a lot of time. Grouping allows you to combine multiple elements so they move and resize together. Whether you are designing social media posts, presentations, or marketing materials, this feature helps keep everything aligned and organized.
What Does Grouping Mean in Canva?
Grouping in Canva means combining two or more design elements into one unit. Once grouped, they behave like a single object. For example, if you group a text box and an image, you can move them together without adjusting each item separately.
 Understanding how to group in Canva is important because it improves workflow, reduces mistakes, and keeps your layout consistent.
Why Grouping in Canva Matters?
Grouping in Canva is important for several reasons. It saves time while editing by allowing you to move or adjust multiple elements at once instead of changing them individually.
It helps keep elements properly aligned, making your design look neat and professional. Grouping also makes resizing much easier, as you can scale everything together without disturbing the layout.
In addition, it prevents accidental movement of individual elements and improves overall design consistency. When you understand how to group in Canva properly, your design process becomes smoother, faster, and more organized.
How to Group in Canva
Now let’s look at the exact steps to group elements in Canva.
 Step 1: Open Your Design
Log in to your Canva account and open an existing design or create a new one.
Step 2: Select Multiple Elements
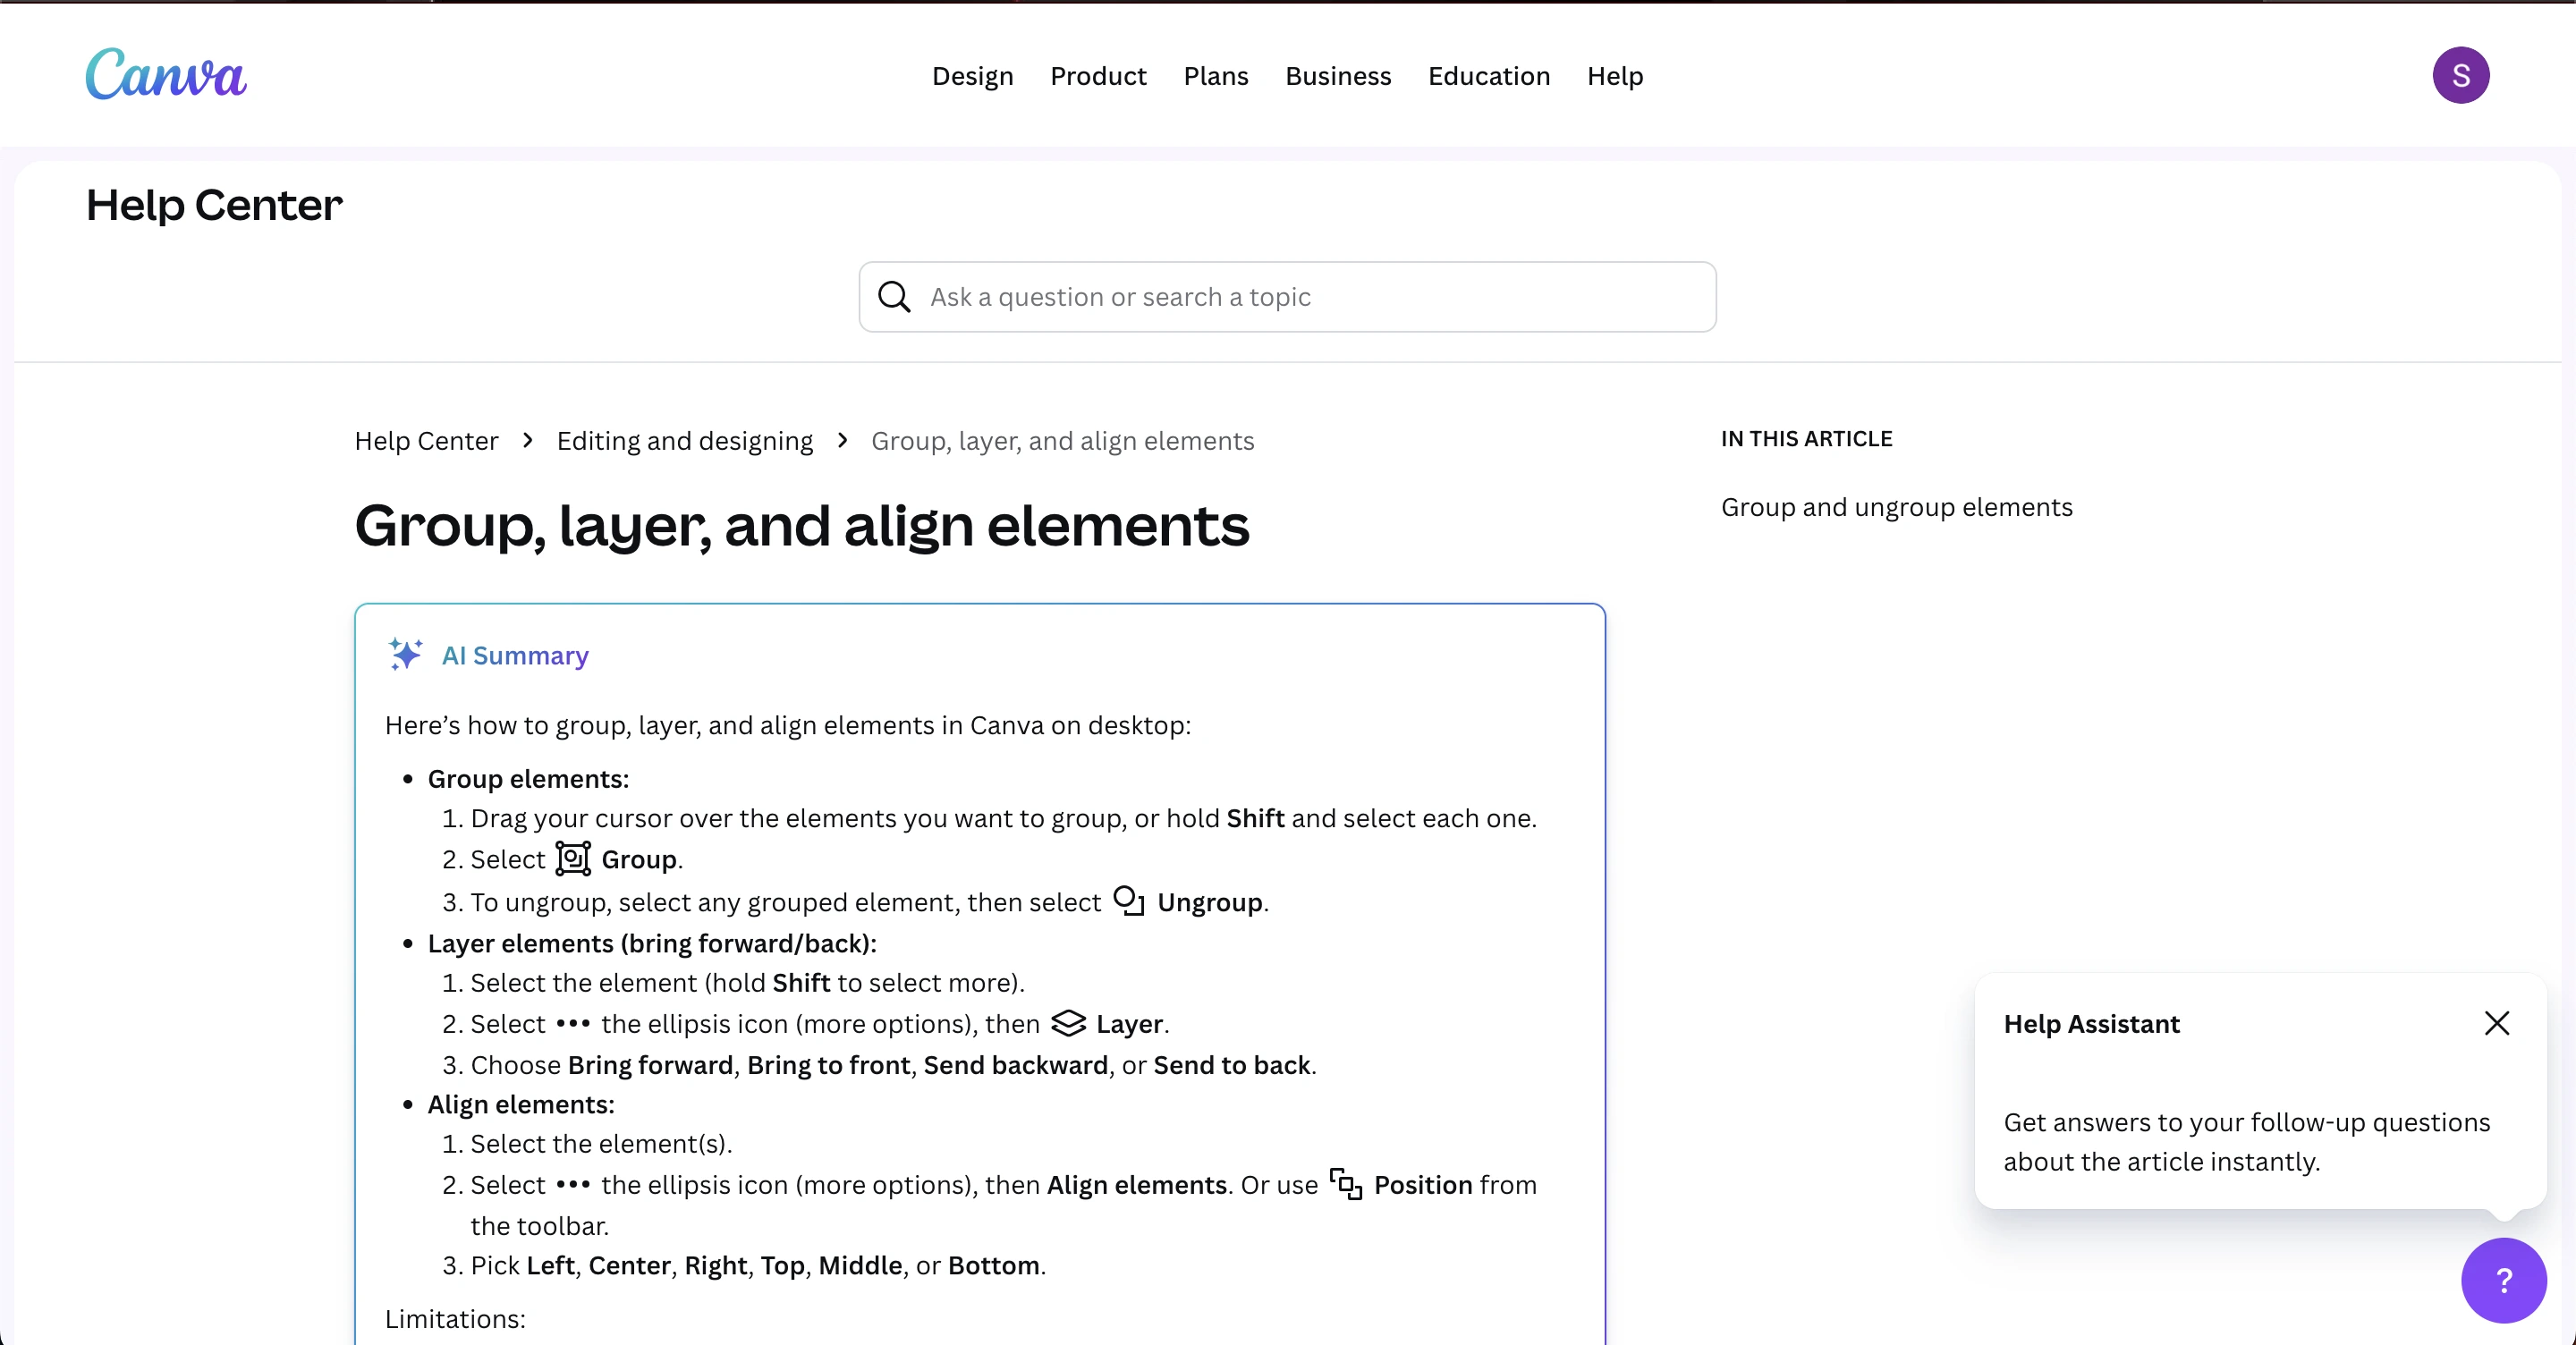
Click on the first element you want to group. Then, hold the Shift key on your keyboard and click on the other elements you want to include in the group.
This allows you to select multiple items at once, including text, images, shapes, icons, and other design elements.
Step 3: Click the “Group” Button
Once you have selected the elements, look at the top toolbar and click on Group.
Your selected items will instantly be combined into a single group, allowing you to move, resize, or edit them together. That’s it! This is the basic method of how to group in Canva.
Canva Grouping Shortcut
If you prefer faster editing, you can use a keyboard shortcut to group elements in Canva.
After selecting the items you want to combine, press Ctrl + G on Windows or Command + G on Mac. Using this shortcut makes grouping quicker and helps speed up your overall design workflow.
How to Ungroup in Canva?
Sometimes you may need to edit individual elements again after grouping them. To ungroup, simply click on the grouped object and select Ungroup from the top menu.
You can also use a keyboard shortcut press Ctrl + Shift + G on Windows or Command + Shift + G on Mac. Understanding how to group in Canva also means knowing how to easily reverse the action whenever needed.
Grouping in Canva on Mobile
If you’re using the Canva app on your phone or tablet, the steps are a bit different. Tap and hold the first element, then tap the additional elements you want to include.
Once selected, tap Group from the bottom menu. The mobile version makes it easy to group elements in Canva, allowing you to design efficiently even on the go.
Key Features
Grouping in Canva is more than just combining elements it comes with several useful features that make designing faster and more precise.
1. Move Multiple Items Together
Once elements are grouped, you can drag the entire group at once, keeping everything aligned perfectly without having to move each item individually.
2. Resize Proportionally
When you resize a grouped object, all the elements scale together, maintaining spacing, proportions, and overall design balance.
3. Rotate as One Object
You can rotate the entire group in one motion, so every element stays correctly positioned relative to the others.
4. Duplicate Easily
Need to repeat the same design element? Duplicating a group lets you copy everything at once, saving time compared to copying items individually.
5. Maintain Layout Structure
Grouping protects your design from accidental changes, ensuring your layout remains consistent and organized.
These features highlight why mastering grouping in Canva is essential for creating designs efficiently and professionally.
Read Also: Wondershare VirtuLook: 5 Best AI Alternatives
Use Cases
Let’s explore real-life examples where grouping is useful.
1. Social Media Posts
When creating graphics for Instagram or Facebook, your design may include a background shape, text overlay, and decorative icons.
Grouping these elements ensures they stay together when you move or reposition them, making it easier to maintain your layout and keep your design organized.
2. Logo Design
Logos often consist of text, symbols, and taglines. By grouping these elements in Canva, you can easily move and resize the entire logo as a single unit, keeping all parts perfectly aligned and maintaining the design’s integrity.
3. Presentations
In slides, grouping helps keep titles and supporting graphics aligned properly.
4. Marketing Flyers
Flyers often contain images, text blocks, and call-to-action buttons. Grouping these elements in Canva helps keep all parts organized during editing, making it easier to move, resize, or adjust the flyer without disturbing the layout.
5. YouTube Thumbnails
Thumbnails require precise alignment. Grouping allows you to adjust the layout without disturbing text placement.
Advanced Tips for Grouping in Canva
If you want to improve your workflow, try these tips:
1. Use Layers Panel
Open the “Position” tool to manage layers. This helps you organize grouped items properly.
2. Group Before Duplicating
Always group elements first if you plan to duplicate them. It prevents alignment errors.
3. Lock Important Groups
After grouping, you can lock the group to avoid accidental changes.
4. Combine With Alignment Tools
Use alignment guides along with grouping to keep spacing even.
Mastering these techniques makes learning how to group in Canva even more powerful.
Common Problems and Solutions
Even though grouping in Canva is simple, users sometimes encounter issues. One common problem is the Group button not being visible this usually happens if you haven’t selected more than one element or if some elements are locked.
Another issue is being unable to select certain elements, which often occurs when templates include locked components that need to be unlocked first.
Additionally, grouped elements can sometimes move out of alignment, which can be avoided by making sure all intended elements are selected before grouping. Knowing these fixes helps you master how to group in Canva smoothly and without frustration.
Benefits of Using Grouping Regularly
Using grouping consistently in Canva offers several long-term advantages. It speeds up editing time by allowing you to move or adjust multiple elements at once, ensures a better overall design structure, and reduces the chances of layout mistakes.
Grouping also creates a cleaner workflow, making your workspace more organized, and improves productivity by streamlining repetitive tasks. With regular practice, mastering how to group in Canva naturally boosts your design speed and efficiency.
Grouping vs Locking in Canva
Grouping | Locking |
|---|---|
Combines elements so they move together | Prevents an element from being moved |
Useful for editing multiple items at once | Useful for protecting elements from accidental changes |
Helps maintain layout consistency | Keeps important elements fixed in place |
Ideal for moving, resizing, or rotating as a unit | Ideal for preventing unintended edits |
Speeds up workflow when adjusting designs | Ensures design stability |
When Should You Avoid Grouping?
Although grouping is very helpful, there are situations where it may not be the best option. For example, if you need to make frequent edits to individual elements, keeping them separate can save time.
Grouping may also not be ideal when elements require different animation effects, as animations often apply to the entire group. Additionally, when working with templates that have fixed formatting, grouping certain parts could interfere with the original structure.
Understanding when not to group is just as important as knowing how to group in Canva.
Design Consistency with Grouping
Consistency plays a key role in effective branding, and grouping in Canva helps maintain equal spacing, balanced alignment, and fixed proportions throughout your design.
This is especially valuable for businesses that create multiple graphics with similar layouts, as grouping ensures a uniform and professional appearance across all designs.
Grouping in Free Canva
Grouping is available in the free version of Canva, so you do not need a paid plan to use this feature. It works across free accounts, Canva Pro, and Canva for Teams, making it accessible to all users.
This means anyone can learn how to group in Canva and improve their design workflow without upgrading to a premium subscription.
Final Thoughts
Learning how to group in Canva may seem like a small feature, but it has a big impact on your design process. It saves time, keeps layouts clean, and improves overall productivity.
Whether you are a beginner or experienced designer, grouping helps you stay organized and work more efficiently. By following the steps, shortcuts, and best practices explained above, you can confidently use grouping in all your Canva projects.
Frequently Asked Questions (FAQs)
How do I group items in Canva quickly?
Select multiple elements and press Ctrl + G (Windows) or Command + G (Mac).
Can I group text and images together?
Yes, Canva allows grouping of text, images, shapes, and icons.
Is grouping available on mobile?
Yes, you can group elements in the Canva mobile app.
I ungroup later?
Yes, you can ungroup anytime using the ungroup button or keyboard shortcut.
Does grouping affect image quality?
No, grouping does not reduce or change image quality.